|
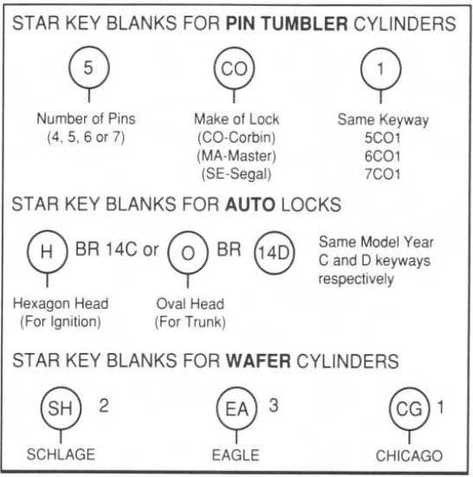
If you were lucky to be around when STAR KEY Industries, Inc. out of Brooklyn, N.Y. was around, you would agree their key blanks and numbering system were very friendly to the locksmith profession. STAR was considered the innovators of the true EZ coding system, which was designed to easily identify key blanks by reference only to the numbering code. It's numbering system typically consisted of three parts. 1 - The "prefix" which designated the number of pins in the lock. 2 - A lock manufacturer identification code. 3 - A keyway "suffix" which designates the keyway. A 5CO1 fits a 5 pin Corbin lock and a 5CO1, 6CO1 (6 Pin), and a 7CO1 (7 Pin) all fit the same keyway but each work with a different amount of pins, 5, 6 & 7 respectively. Back when cars used a 2 key system, one for the ignition and one for the doors or trunk, STAR used different prefixes such as "H" (hexagon shape of the key) for the ignition and "O" (oval shape of the key) for the doors or trunk. These key shapes were typically used by General Motors and sold by Briggs & Stratton at the time.
The STAR brass blanks were great for impressioning locks because they were soft enough to get great impression marks but still strong enough to withstand torque and wear. Impressioning marks are more visible on brass compared to a nickle plated key. The fact that these keys where both soft and hard at the same time, which sounds like an oxy-moron, made them the key of choice by many locksmiths. The traditional brass keys self lubricated the keyway with the brass to brass contact against the internal brass pins of the lock cylinder itself. Certain keyways were also available as a modified form of a "universal" keyway, such as in General Motors vehicles. These universal key blanks allowed for a specially milled key to pass into a variety of keyways or sections. Simply put, STAR was an industry STAR!
0 Comments
The SOPL uses this great course manual as part of the STI Training. Now the authors have made it available for only $9.99 on Amazon. You will get a fantastic primer on Safe Manipulation, Wheel Packs, Dialing, Graphs, Amplification and more. It makes safe manipulation easy to understand, less intimidating. Moving on to Group II locks afterwards is much easier after learning the basic concepts.
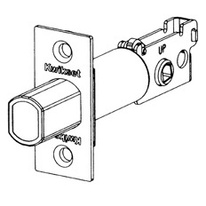
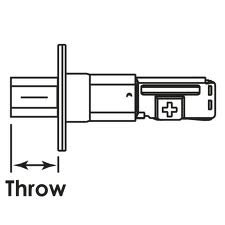
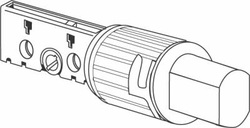
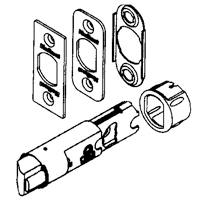
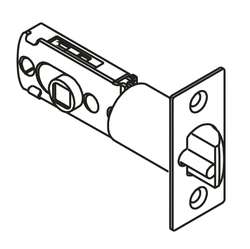
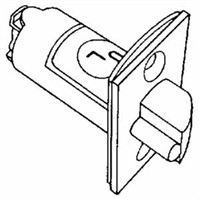
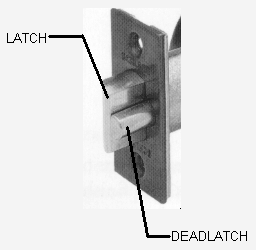
The SOPL hosts a comprehensive test and certificate for this e-book material. If you purchase this e-book and want to access the testing, let SOPL Admin know and we will use some of your membership VIrtual Dollars as payment. If your not a member, contact us to discuss access and cost to the test. This e-book course material nails the topic and makes it fun to learn. Click on the image to get yours today! Your locks utilize latches or bolts to engage your door frame and secure your doors. They come in several varieties depending on the type of installation or manufacture however, there are a few standards which making their identification pretty easy. Standard Face Plate - This face plate is recessed into the edge of the door. This type of face plate is either square or has rounded edges. A manufactures name can be seen on the plate, if there is no name then in most cases it is a generic import. every bolt should provide a minimum of 1" "throw" or projection to provide adequate security. Drive In - the drive in bolt performs the same as the standard face plate bolt, however it does not require and mortise cut out or chiseling into your door. A standard bolt can be used in place of the drive in with minor alteration to the door however, a drive in bolt is cannot typically be used in place of the standard bolt unless it is designed to accommodate twist on face plates as shown in the example below. Latches - A latch is similar in first appearance to the bolts however, the latch has a beveled shape. Latches automatically "latch" a door when closed, a bolt must be turned manually. Latches also come as drive-ins like the bolts above. What is a Deadlatch? - The protrusion shown in the illustration below identify the latch as having an auxiliary feature which prevents the latch from retracting under pressure when in the projected position and properly engaged with the strike plate on the door frame. This feature is used on key operated locks and prevents bypassing or shimming with credit cards or a similar material or tool. Latches without this feature should not be used for security areas where key operated locks are required. Passage locks, closets and bathrooms typically utilize latches without the deadlatch feature. Call your local Society of Professional Locksmith member when seeking advice or service!
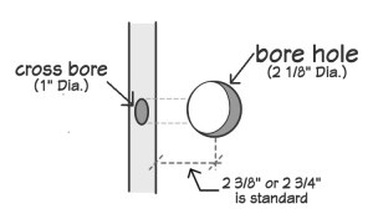
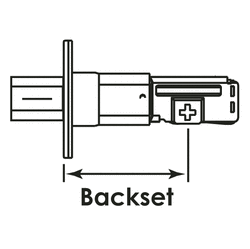
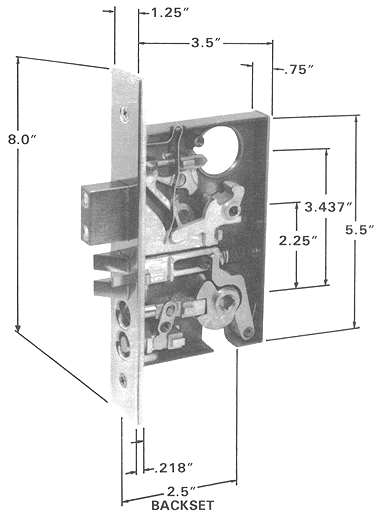
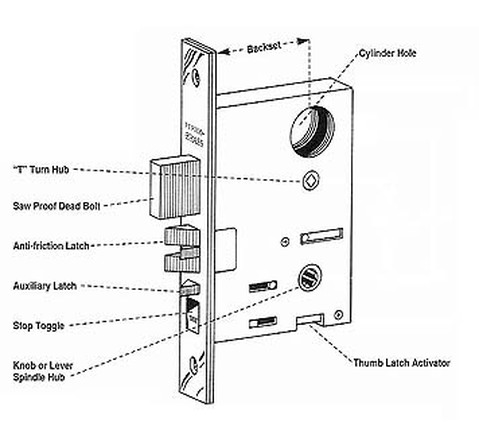
If you learned anything from this blog entry or simply liked what you saw, please give it a Like or Tweet! The backset is the distance from the edge of the door to the center of the 2-1/8" bore hole. In the U.S. there are two common backsets for residential and commerical locks, 2-3/8" and 2-3/4". Another way to understand the measurement of the backset is to measure from the edge of a door to the center of the locks keyway. The image seen below is a standard hole preparation for deadbolts and knob/lever locks. You can also identify your backset by measuring you deadbolt or latch. Below is examples of a mortise lock. The backset is also measured from the edge of the door or the locks faceplate to the center of the locks mortise cylinder hole or keyway. The mortise lock has additional dimension which are critical for proper identification and replacement and should be included in your identification process. Call your local Society of Professional Locksmith member when seeking advice or service! If you learned anything from this blog entry or simply liked what you saw, please give it a Like or Tweet! Backset image on this page was created and published on Directdoorhardware.com
 Click image to enlarge Click image to enlarge #1 - Arrive to work on time #2 - Keep a clean and organized work truck #3 - Prepare the next days jobs by 3:00 p.m. the day before #4 - Keep keyed alike cylinders ready in pairs, and sets. #5 - Learn to say NO. #6 - Salvage the important parts, discard the rest. #7 - Keep a daily "Things to Order" list, then order them. #8 - Have sharp drill bits. #9 - Route your jobs in a straight line. #10 - Stop returning to the shop to get parts. What habits do you think are important? Please share your comments, give this a Facebook LIKE or Tweet!
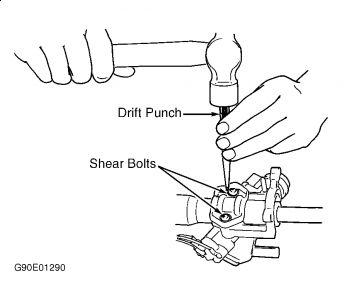
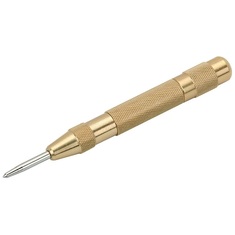
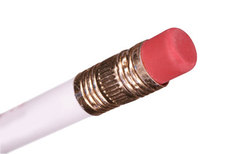
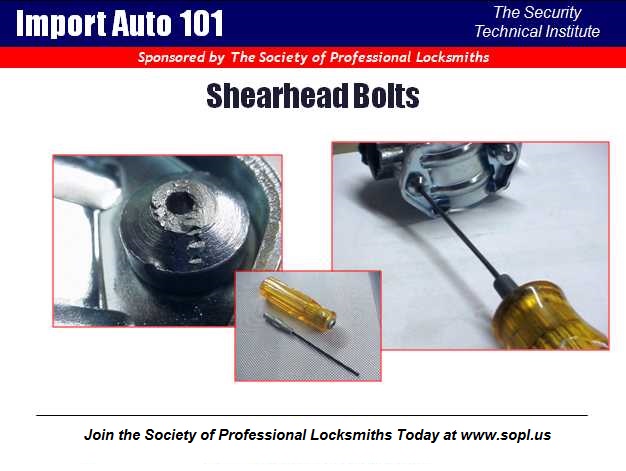
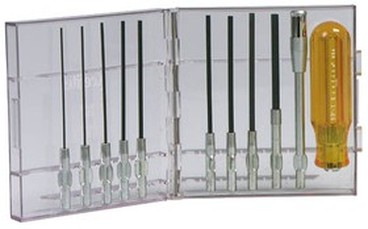
There are two common ways that locksmiths remove the shear head bolts or fracture bolts used on automotive steering columns. One is by using a pointed punch and hammer to strike the outer diameter in a counterclockwise direction to loosen them while the other is to grind a slot into the top to act as a screwdriver flat slot to unscrew them. Some locksmith even resort to using an impact wrench or needing to attach a vice grip to a square screwdriver to break the threads free. These methods can often be problematic, and great care needs to be given to avoid damage if the steering column itself has not been lowered or removed enough to provide clearance for these tools between the dash and steering wheel. The Society of Professional Locksmiths recommends a few more creative time saving methods which can help to avoid potential damage. Using an automatic center punch to remove the shear head bolts from automotive steering lock harnesses is very easily accomplished and does not require any steering columns to be lowered or removed. Placing the tip of the tool on the outer edge of the shear head bolt and depressing it while applying counterclockwise pressure will quickly loosen them. Using a rubber pencil eraser against the top of the bolt and continuing to rotate counterclockwise will remove the bolt. Another removal method that does not require lowering the column is to drill into the center of the shear head bolts approximately 1/8th of an inch and then using a hex key like one from the Xcelite Hex Socket Driver Set to be inserted into the hole in order to easily unscrew the bolt. Inserting a slightly larger socket type hex key into the hole, and giving it a gentle tap will allow the hex shape of the key to cut into the drilled circle of the hole, thereby gripping the bolt firmly. To reassemble the column mounting bracket, you can reuse the old bolts and screw them in quickly. Members of he Society of Professional Locksmiths participate in continuing education and professional development programs to provide the consumer the best possible service.
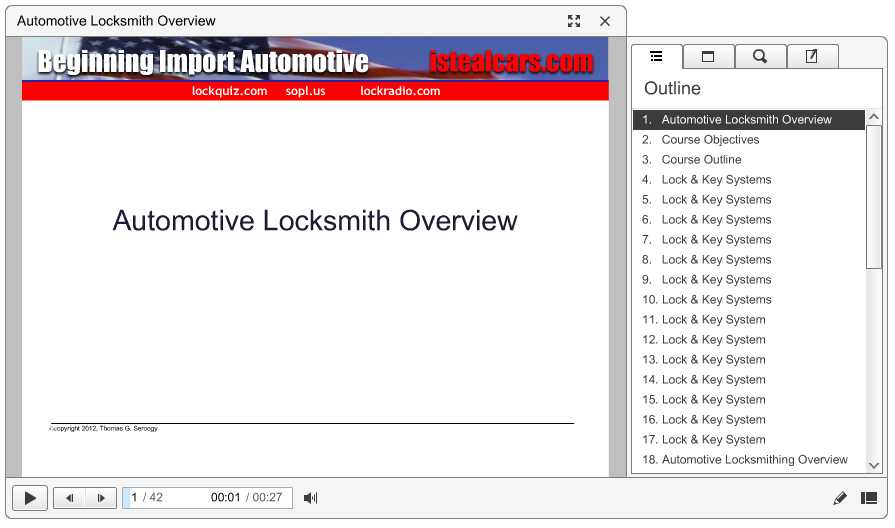
If you learned something new from this blog tip or have more to contribute, please share your comments, give it a Facebook LIKE or Tweet! Turn on your speakers, the presentation is a flash file and will start automatically but give it a few moments to load. This is a summary course which covers automotive locksmith basic information. You can control the slides with the navigation buttons provided and you may view this sample as many times as you wish! Enlarge the presentation to full screen and enjoy! The SOPL offers additional advanced topics for Automotive Transponders, High Security Automotive Locks, Import & Domestic Auto, Key Generation, Auto Entry and much more!
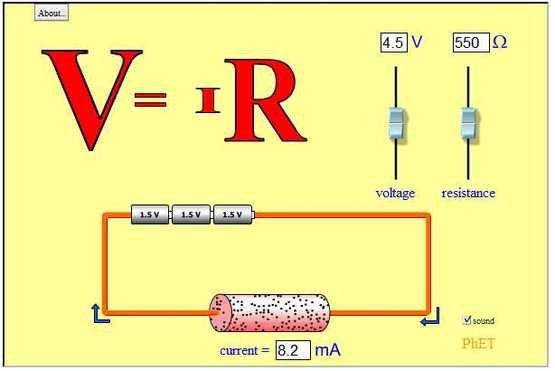
http://www.sopl.us/webcast-sample.html Learn Ohm's Law, Faraday's Law, circuit construction, power generation, resistance, magnetism, voltage and more using fun interactive electronic simulators where you can see the relation to one another. Each simulator be will download onto your computer which you can experiment with at any time!
Members of he Society of Professional Locksmiths participate in continuing education and professional development programs. http://www.sopl.us/electronic-simulators.html If you are a locksmith looking for a complete electronics and basic electricity course, then this is it! Plus it is completely FREE!
Free is good, but when you compare all the collected resources the SOPL has assembled for you, there is no comparison. There are many hours of repeatable online webcasts that you can participate in at any time and play them back as many times as you need. Take advantage of this great collection! http://www.sopl.us/electronic-systems.html Learn all about - Basic Electronics and Units of Measure Electrical Quantities Light and Other Waves Magnetism and Electromagnetism Basic Components and Technical Notation Technical Notation Wire and Cable Electronic Components Resistors Electronic Components Circuits Basic Requirements for Current Series Circuits Part 1 Series Circuits Part 2 Series Circuits Part 3 Voltage Sources Parallel Circuits Series Parallel Circuits Complex Circuits Ground and Other Reference Points Circuit Troubleshooting Troubleshooting Series Circuits Troubleshooting Parallel Circuits Troubleshooting Series-Parallel Circuits Troubleshooting Strategies Transformers Electronic Lab |
Categories
All
|
Services |
Company |
|




 RSS Feed
